Wednesday, May 19, 2010

Rolled Peter Pan collar


This collar is made-up of a single piece. It is turned down with a rolled effect at the neck line.
Join Front and back bodice at shoulder line
Measure the neckline of front and back.
A-B = ½ neck line +¼”
Draw perpendiculars from A and B
A-C = collar width=2½”
A-C = B-D
D-F =¾”
B-E =1½”
Join E-F
Shape A-B-F and C-F as shown


Photobucket

Various types of flat Peter Pan collar


Photobucket

Tuesday, May 18, 2010

Method of sewing flat Peter Pan collar


Step 1

Place the shoulder lines of front and back of the bodice draft together on a sheet or paper as shown in the figure. Let Points at E coincide and points at F overlap by 1/2” .
Step 2
Trace the neck line A- E-C. Remove the Front and back draft. Draw another line A’ E’ And C’, 2” away from the neck line and parallel to the neck line A-E-C and give shape as shown in the figure.
Step 3

Add ½” seam all around and cut the draft of the collar.

Stitching

Simple and easy to follow Tutorial is here which explains the method of attaching peter pan collar


Photobucket

Monday, May 17, 2010

Method of cutting chudidar by preparing a bias bag (method 2)


Turn the bag in such a way seams do not fall on the portion below the knee.

Draft    is placed on the bias bag as shown in the figure and pattern pieces are cut.

The green dotted line is the stitching line on the bag,behind the draft

Practice preparing the bias bag with some waste material and then do the actual one.

Photobucket

Chudidar pyjama Method 1


Cudidar pyjama is a pyjama with fullness at the top and tightly fitted below the knee level. Length of the pyjama will be more than the actual length .There will be gathers below the calf.Chudidar goes well with Anarkali top.

Chudidar is cutting is done on bias .It can be done in two ways.
Method 1.By keeping the draft on the material in bias
Method 2. By preparing a bias bag.

Measurements

1.Full length
2.Seat
3.Knee round
4.Bottom round

Instruction for drafting

A-D =full length
D –E = for gathers =3 to 5” or to taste
E-F =I” for folding.
A-G =1⅛” for casing
A-B = 1/3 seat + 1”
C is the midpoint of B-D.
Draw perpendiculars from the points G, A, B, C, D, E and F
G-H= 1/3 seat+ 2”to 4” as per wish
G-H = A-I = B-K.
K-R =1½” to 2”
R-L =1½”
J is the midpoint of I-K
Shape the front curve H- I-J-R and back curve (red curved line) H- I- L as shown in the figure.
C-M =half of knee round + ½”
N-E =half of bottom round +½”
R-N =4” to 6” for opening
Join the curve R-M-N-O and L-M-N-O as shown on the figure
Red line is back shape of the chudidar

Method 1.


In this method draft is placed on the material in bias. See layout 1. Plenty of material gets wasted in this method .If the width of the material is not enough divide the draft in to 2 pieces by cutting on the dotted line P-Q ,marking point Q along the line G-F such that A-Q = 1/6th of seat + 1"and P-Q is perpendicular to A-Q. Unfold the draft .Cut the upper part on straight grain and the lower part on true bias. Add ½” seam allowance at each side along the line P-Q. in the draft. Later on stitch the two pieces together and proceed.


Photobucket

Friday, April 16, 2010

A line Kurthi


Bodice

Simple kameez draft can be modified to A line Kurthi by making following changes.
The length of Kurthi is measured from the nape of neck to hip or to taste.
Shape of the side is should be changed.
This dress can be stitched with or without waist darts.
Figure 1 is the draft of simple kameez. Pink dotted lines show the changes that are made.
A-Z = Length of Kurthi
Draw perpendicular from the point Z.
Z-X=D-F +2½”. Join F-X.
Figure 2 is the draft of A line Kurthi.

Sleeve

Draft of the Kurthi sleeve is same as draft of the Simple kameez sleeve.

Photobucket

Saturday, March 27, 2010

Method of stitching Patiala salwar


Measurements needed


1 Seat
2 Full length
3 Crotch depth=Sit on a hard chair and measure at the side from the waist to the chair seat .
or 1/4th of seat +4"
4 Leg round

Waist band

A-B=seat/2 + 1½” or to taste depending upon the fitting needed.
A-C =Seat/6 +2”.

Side panel

E-G =full length –length of the waistband +2½”.
Mark point I such that E-I = E-G – 3”.
Draw perpendiculars from E, I and G.
E-F =panel width=Leg round + 2 to 4” depending upon the built of the person.
I – J = E-F.
G-H =leg round/2 + 1”. Join F-G-and H.

Kali

K-M = F-J of the side Panel.
K-O = crotch depth - waist band length + 1”.
Draw perpendicular from K and O.
K-L = width of the material used for stitching.
O-N = K-L .Join L and N. Join M-N by curved line as shown in the figure.


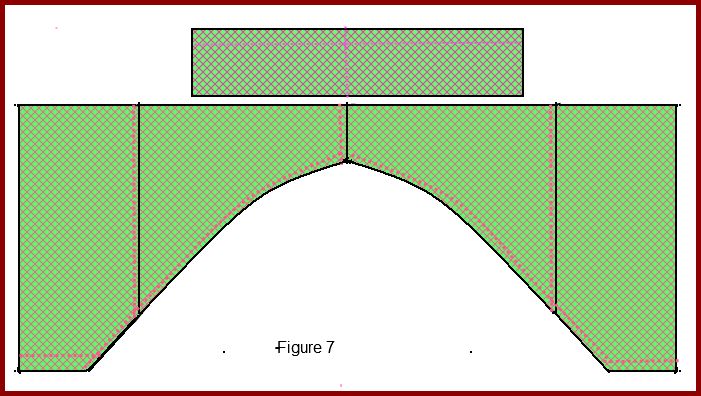
prepare the draft Place the draft on the fabric as shown in the layout in Figure 2 and cut the pattern pieces. Cut kali along the line K-M and separate

Pattern pieces

Waist band -2nos
Side panels –2 no’s
Kali-4 nos

Stitching

Turn in 2” of the leg round H-G-H’, and stitch sandwiching 1½” of canvas in between the folds
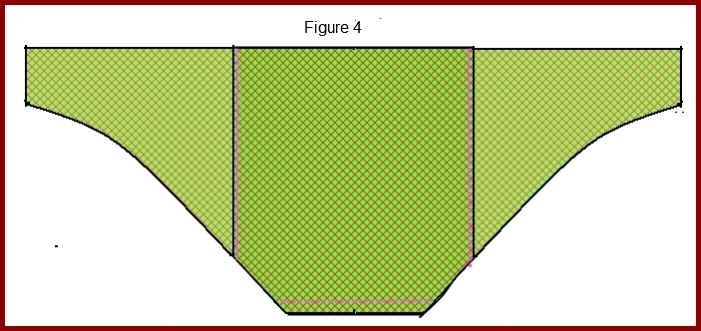
Take one of the side panel and attach kali on either side as shown in the figure 4. Do the same thing for the other side panel.


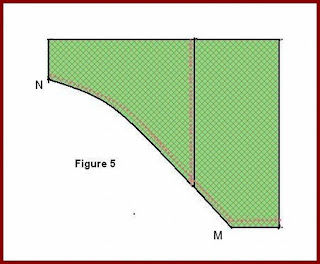
Fold this into half along the line E-G, keeping right sides together and stitch the curve M-N as shown in the figure 5Stitch the other leg portion also in the same manner.


Keeping right sides together join these two leg portions at the crotch line as shown in the figure 6.


Join the two pieces of the waist band. Keeping right sides together pin front crotch seam ( select any one ) to front waist band seem(select any one). and back crotch seem to back waist band seem. Attach each leg portion with the waist band by taking pleats of equal width .The pleats should start from the centre of the front portion of the waist band and extend upto the centre of the back of the waist band. The pleats of each leg portion should be facing each other.


Fold the other edge of the waste band by 1” and prepare casing for the draw string.


Photobucket